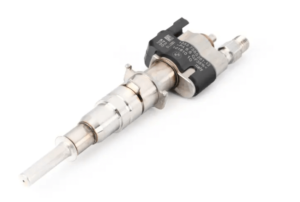
Important Notice
First, pay attention to the warning label on the cylinder head cover!
- Disconnect the negative terminal of the battery (there is a risk of fire due to short circuits during disassembly). The electric fuel pump will automatically activate when the door is opened; work on the fuel system can only proceed when the coolant temperature is below 40°C. Before installation, use facial protection and gloves, as injectors may spray high-pressure fuel at any time. To reduce fuel pressure, place a cloth over the injector and carefully tap it with a wrench. There is a risk of injury as long as fuel pressure has not been reduced.
Notes:
- When assembling, strictly follow the bolt connection sequence and torque specifications; failure to comply may result in leaks.
- Maintain cleanliness when working on high-pressure fuel systems.
- Contaminants can cause system malfunctions.
- No dirt or foreign objects are allowed into the system.
- Remove contaminants from lines or parts before disassembly.
- Use only lint-free cloths.
- Seal all openings in the fuel system with caps or plugs.
- High-pressure lines can only be retightened a maximum of 10 times. Injectors are not waterproof.
- Engine cleaning can only be performed after installing the ignition coil cover.
Preparation Steps:
- Remove the ignition coil from the corresponding cylinder.
- Ignition coils must not be contaminated with fuel, as the stability of silicone materials can significantly decrease upon contact with fuel, potentially leading to ignition coil failure. Therefore, protect the spark plug holes with cloths to prevent fuel ingress.
- Clean the spark plug holes with compressed air before installing the ignition coils.
- Ensure the spark plug holes are absolutely clean.
- Remove the high-pressure line from the corresponding cylinder.
Instructions:
The following description applies to all injectors. Disconnect and remove the connector, loosen the bolts, and remove the clamping device to take out the injector.
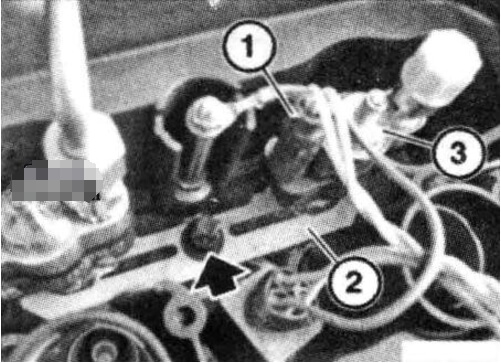
① Connector
② Clamping Device
③ Injector
Tip: If multiple injectors are removed, ensure that each injector is reinstalled in its original position (cylinder). Mark the injectors accordingly.
Fixed Injector Working Steps:
Install the special tool 130 180 onto the injector.
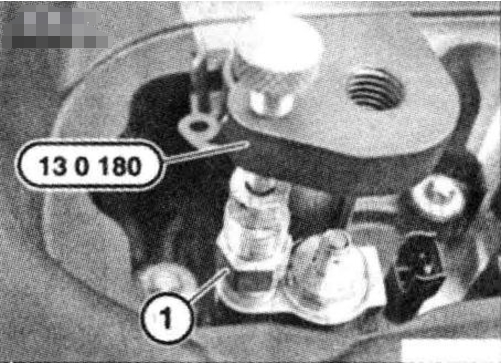
① Injector
Carefully use special tool 135 250 along with 130 180 to tap out the injector.
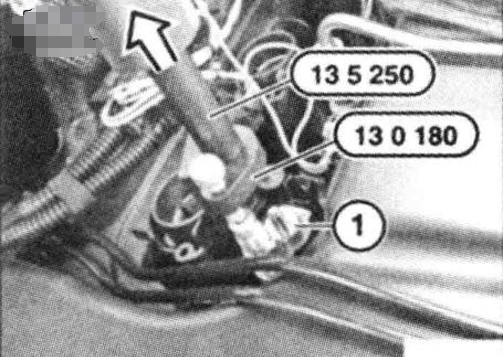
① Injector
After removal, seal the injector nozzle and fuel line connection with caps (① and ③). Caps can be purchased through the BMW parts department.
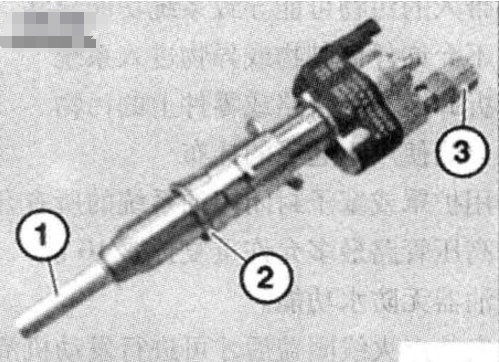
① Cap
② Decoupling Element
③ Cap
Installation Instructions:
When installing new injectors:
- Update the decoupling element.
- The cap on the injector nozzle can be removed no earlier than 10 minutes before installation (PTFE sealing ring expands).
When reusing injectors:
- Update the decoupling element.
- Update the PTFE sealing ring.
When reinstalling the injector, the PTFE sealing ring that has overheated due to engine operation must be replaced.
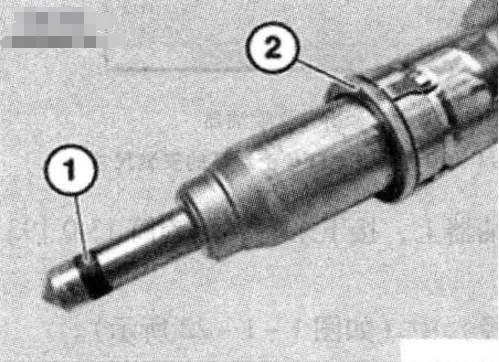
① PTFE Sealing Ring
② Decoupling Element
Updating the PTFE Sealing Ring:
When installing a new PTFE sealing ring, both hands and the work mat must be clean and oil-free to avoid mechanical contact with the injector nozzle.
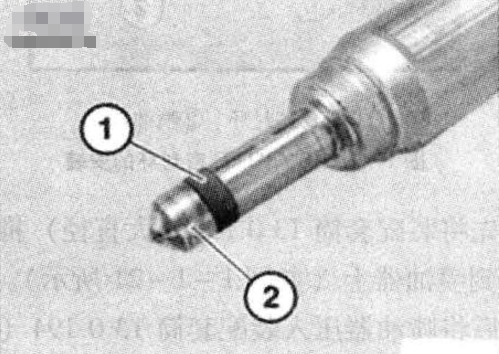
① PTFE Sealing Ring
② Injector Nozzle
Use special tool 130 191 to remove the PTFE sealing ring. Only lint-free cloths may be used to clean combustion residues from the cylindrical part of the injector (do not use ultrasonic or other auxiliary tools). Do not clean the injector nozzle.
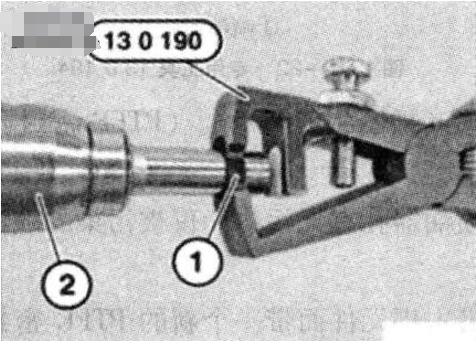
① PTFE Sealing Ring
② Injector
Push the new PTFE sealing ring onto the assembly cone 130 195.
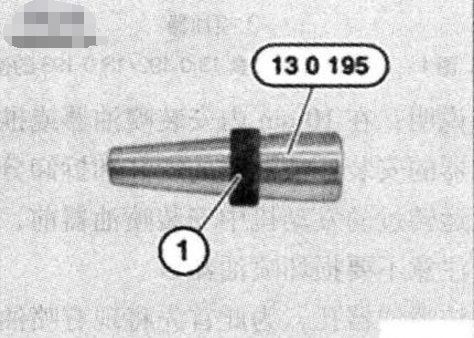
① PTFE Sealing Ring
Push the PTFE sealing ring onto the injector using your fingers and the assembly cone 130 195.
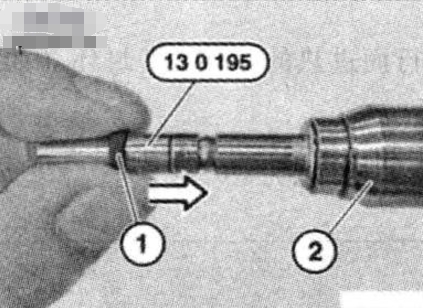
① PTFE Sealing Ring
② Injector
Tip:
- Do not use fingernails to push the PTFE sealing ring.
- Do not use lubricating aids.
- The sealing ring will expand when pushed on.
To adjust the expanded PTFE sealing ring to the installation size, gradually push three assembly sleeves of decreasing diameter onto the injector. Push the assembly sleeve with the large opening onto the injector. Do not use lubricating aids.

① Assembly Sleeve
② Injector
First, push assembly sleeve 130 192 (large diameter) onto the injector, then push assembly sleeve 130 193 (medium diameter) onto it.
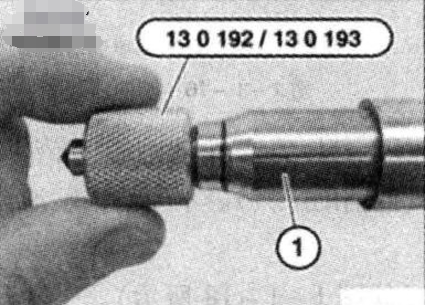
① Injector
Finally, press the injector into assembly sleeve 130 194 (small diameter).
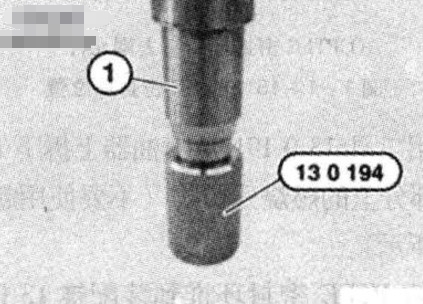
① Injector
Installation Instructions:
Install the injector or push on the cap within 10 minutes .
- Before installing injectors on a running engine, check the injector holes for contaminants. Only contaminated injector holes need cleaning. Take care not to damage the injector.
- Clean the injector holes by repeatedly pushing a new PTFE sealing ring into the injector hole without the decoupling element, then pulling it out. This PTFE sealing ring must then be replaced.
- Clean the contact surface of the decoupling element in the cylinder head.
- Update the decoupling element.
Injector Matching:
If one injector has been replaced or swapped on the cylinder side, injector matching must be performed. Injector matching can be done using the so-called matching values. Matching values are divided into two groups, each group containing three digits stamped on the injector. The matching values must be read before installation.

Input the matching values according to the installation position (cylinder). If injector matching is not performed, the engine may run unevenly or fail to start. Injector matching is described at the end of these instructions.
Installation Instructions:
Install the clamping device with the arc facing upwards. Install the injector and then the clamping device.

① Clamping Device
Note: Only slightly tighten the bolts so that the clamping device remains loose and the injector can be rotated if necessary. Connect the contact plug.
Tip: Ensure the correct positioning of the clamping device.

① Clamping Device
The copper sealing rings that may be installed on the high-pressure lines should no longer be used and must be removed. When reusing high-pressure lines, lightly lubricate the bolts with gear oil; new high-pressure lines are pre-treated.

① Copper Sealing Ring
Install the high-pressure line, only slightly tightening the nuts.
Note: The high-pressure line must be installed without tension! To ensure stress-free installation of the high-pressure line and to prevent thread damage, both nuts must be easily hand-tightened. If the nuts cannot be easily hand-tightened, the injector must be slightly rotated.

① High-Pressure Line
If necessary, rotate the injector in the direction of the arrow until the nuts on the high-pressure line can be easily hand-tightened. Slightly tighten the nuts on the high-pressure line, then tighten the bolts of the clamping device.
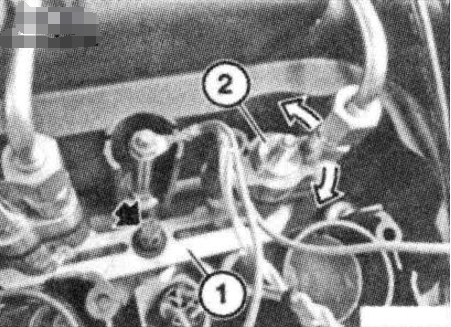
① Clamping Device
② Injector
Follow Tightening Order:
First, tighten the nuts on the injector, then the nuts on the fuel rail. When tightening the nuts on the injector, hold the injector at the hex section with a wrench and use special tool 371 151 to tighten the nut.
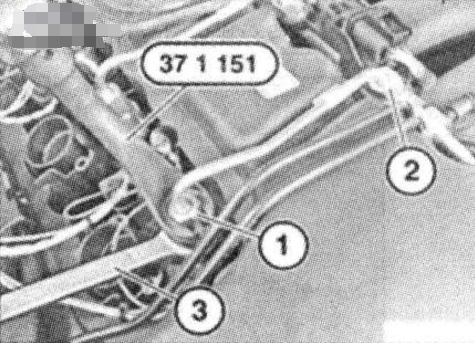
① Nut on Injector
② Nut on Fuel Rail
③ Wrench
Perform Injector Matching:
- Connect the DIS tester.
- Identify the vehicle.
- Select “Function Selection.”
- Choose “Service Functions.”
- Select “Engine Electronic Control System.”
- Choose “Matching Program.”
- Select “Injector Matching.”
- Switch to “Test Plan.”
For each replaced injector, the matching values must be entered according to the installation position (cylinder). Clean the spark plug holes and assemble the engine. Check the fuel system for leaks and perform a functional check on the DME.

